
Forcing the Barrage

The famous Barrage of Otranto (Authors’ map)
The strait of Otranto, between Corfu and Brindisi, which is the passage from the Adriatic to the Mediterranean, was about 100 km wide and “closed” during the war by the famous “Otranto dam”. In reality the latter, designed by the British Navy with reduced resources, was not very effective, especially against submersibles. It included about 50 armed trawlers with Wireless radio that were to warn nearby bases, sending on-site ships from Brindisi in the matter of minutes. Austria-Hungary, for its part, never stopped raiding the “dam”. The few trawlers available on such a large area made monitoring difficult, leaving large gaps open in the area. The defense was also helped by channeling ships via minefields laid near the coast, most of them anchored at 20 meters deep. Also trawlers laying large steel nets supposed to warn them of the passage of the submersibles were placed in several nevralgic points. It is estimated, however, that in bad weather and at night the entire Austro-Hungarian fleet could have passed quietly through and seriously threatened the convoys, especially to the Dardanelles. Fortunately for the allies this situation never took place, and only submersibles passed from time to time (the U6 was the only captured).
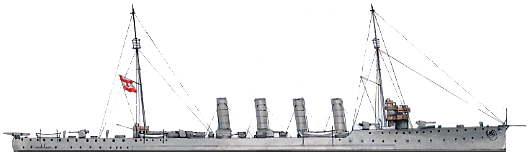
A Cruiser of the Admiral Spaun class, which resembled Tatra class destroyers, and were maskeraded to look even closer
Austro-Hungarian May sortie
In fact, the few really active Austro-Hungarian units were squadrons usually consisting of a light Admiral Spaun class cruiser and several destroyers or torpedo boats. More than 30 sorties were made in four years of war, most of them without results. They degenerated very rarely, into more than skirmishes with one exception: The battle of May 15, 1917.
On the 14th, the Austro-Hungarian flotilla commanded by Captain Miklos Horty, future chief admiral of the fleet and later Hungarian famous statesman, sailed from Cattaro for yet another raid on the dam, in order to attack the lines of surveillance. This flotilla consisted this time of three light cruisers of the Spaun class, repainted and maskeraded as destroyers helped by a silhouette recalling the the Tatra, and expected to play on this resemblance to the full. They were accompanied by two modern destroyers (Czepel and Balaton) and three U-Bootes.
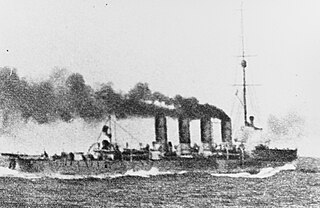
SMS Novara photo when steaming towards Otranto
The two fleets met
In the middle of the night, the squadron was covering out an ammunition transport escorted by an Italian destroyer, and both were sent to the bottom. From then on, they rampaged as planned the line for two hours, from 3:30 to 5:30, destroying or bdly damaging all monitoring trawlers, two of 14 sinking on site, the other being reduced to burning wrecks. The warning was given, and the Anglo-Italian-French Combined Squadron at Brindisi under the command of the Italian Admiral Alfredo Acton, sailed immediately to intercept Horty’s ships before their retreat. The meeting took place under the watchful eye of allied surveillance seaplanes in the area. At the head of the allied squadron were the cruisers HMS Dartmouth and Bristol, and four Italian destroyers led by the Aquila. At about 7.45, they were able to see the Austro-Hungarian ships heading north, but the interception of Horty’s squadron proved a failure because of the lack of coordination between allied ships. Only Aquila was badly hit by gunfire, while the rest of fleet escaped. A chase began, full spead ahead and engines overheating. For the British this proved was too intense and two destroyers eventually had to break and reduce speed while the HMS Bristol later also broke off, until only the Dartmouth and two destroyers were still in.

Two of the numerous drifters that became sheeps in the wolf’s den with the arrival of the Austro-Hungarian fleet
Eventually they catched SMS Novara, which deck was hit, and eventually her bridge too, one hit destroying it and thal the officers including Horty hismelf died or were wounded. The SMS Saida, also hit, approached to take her in tow, and the Dartmouth could have sank them both if a “miracle” never happened: An Italian plane detected at the same time smoke on the horizon coming from Cattaro. Fearing the reinforcement of heavy units, HMS Dartmouth and her escort stopped the pursuit and turned back. The damaged cruisers joined Cattaro soon after. The Dartmouth was torpedoed on her return by the UC25 (a mine-laying type) but survived, while the French destroyer Boutefeu was blown off by one of the mines layed at the entrance of Brindisi by the very same submersible.
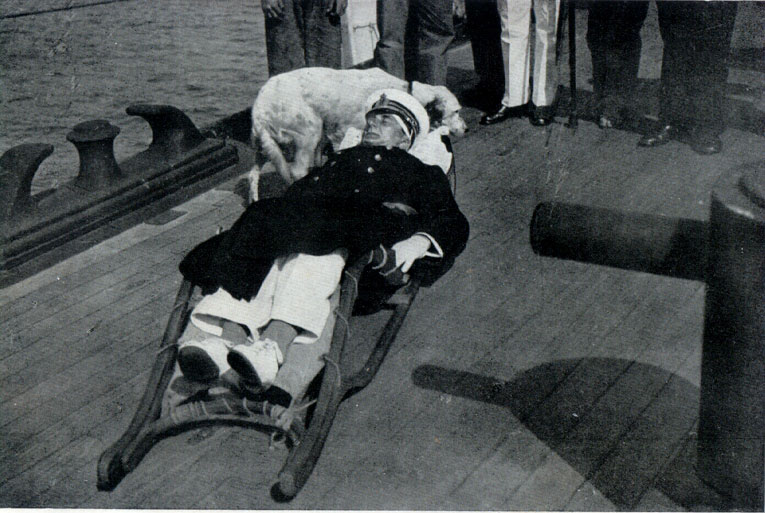
Captain Horty, badly wounded after the battle.

SMS Novara, showing her damage after the battle
Aftermath of the action
Horty, although badly wounded, gained from the action a prestige such that when the mutiny of Cattaro broke out and a change of mind prevailed, he was promoted to the rank of rear-admiral and commander-in-chief of the mutineer’s fleet until the armistice. Miklós Horthy de Nagybánya will then raised to new heights in the interwar and became regent and statesman of Hungary up to the end of WW2. When the Otranto defense staff were blamed for their inefficiency, no one could claim to be able to reinforce this line without the appropriate means, which did never met the requirements until the end of 1917 with the US entry into the war and Australian reinforcements. This otranto Barrage needed the contribution of 35 destroyers and 52 trawlers almost continuously. Therefore the record of this naval action was mixed. HMS Dartmouth and Aquila were out of service for months in dry dock, a transport, an Italian destroyer, and two trawlers were sunk while most of the surveillance trawlers had been put out of action, also for very long, while SMS Helgoland had only been slightly affected, the other two more seriously. Despite this, no new sorties were planned immediately by the Austro-Hungarian admiralty. For the records, there has been another battle of Otranto, this time in November 1940, a minor naval action between Italian and Australian ships.
Read More/Sources
http://www.gwpda.org/naval/j0300001.htm
Map: http://www.gwpda.org/naval/otrantol.gif
https://en.wikipedia.org/wiki/Battle_of_the_Strait_of_Otranto_(1917)
https://en.wikipedia.org/wiki/Mikl%C3%B3s_Horthy
 Latest Facebook Entry -
  X(Tweeter) Naval Encyclopedia's deck archive
 Instagram (@navalencyc)


 French Navy
 Royal Navy
 Russian Navy
 Armada Espanola
 Austrian Navy
 K.u.K. Kriegsmarine
 Dansk Marine
 Nautiko Hellenon
 Koninklije Marine 1870
 Marinha do Brasil
 Osmanlı Donanması
 Marina Do Peru
 Marinha do Portugal
 Regia Marina 1870
 Nihhon Kaigun 1870
 Preußische Marine 1870
 Russkiy Flot 1870
 Svenska marinen
 Søværnet
 Union Navy
 Confederate Navy
 Armada de Argentina
 Imperial Chinese Navy
 Marine Haitienne
 Marinha do Portugal
 Mexico
 Kaiserliche Marine
 1898 US Navy
 Argentina
 Brazil
 Chile
Chile Cuba
Cuba Peru
Peru Bulgaria
 Denmark
 Greece
 Netherlands
 Norway
 Portugal
 Romania
 Sweden
 China
China Thailand
 Sovietskiy Flot
 Royal Canadian Navy
 Royal Australian Navy
 RNZN Fleet
 RIN Fleet
 Chinese Navy 1937
 Kriegsmarine
 Chilean Navy
 Danish Navy
 Finnish Navy
 Hellenic Navy
 Polish Navy
 Romanian Navy
 Turkish Navy
 Royal Yugoslav Navy
 Royal Thai Navy
 Minor Navies
 Albania
 Austria
 Belgium
 Columbia
 Costa Rica
 Cuba
Cuba Czechoslovakia
 Dominican Republic
 Haiti
Haiti Hungary
 Honduras
 Estonia
 Iceland
 Eire
Eire Equador
 Iran
Iran Iraq
Iraq Latvia
 Liberia
 Lithuania
 Mandchukuo
 Morocco
 Nicaragua
 Persia
 San Salvador
 Sarawak
 Uruguay
 Venezuela
 Zanzibar
 Warsaw Pact Navies
 Bulgaria
 Hungary

 Bundesmarine
 Dutch Navy
 Marina Militare
 Yugoslav Navy
 Chinese Navy
 Indian Navy
 Indonesian Navy
 JMSDF
JMSDF North Korean Navy
 Pakistani Navy
 Philippines Navy
 ROKN
ROKN Rep. of Singapore Navy
 Taiwanese Navy
 Vietnam People’s Navy
 IDF Navy
 Saudi Navy
 Royal New Zealand Navy
 Egyptian Navy
 South African Navy


 Ukrainian Navy